How to Remove DNS Unlocker From Chrome
First, uninstall the DNS unlocker app
4 min. read
Published on
Read our disclosure page to find out how can you help Windows Report sustain the editorial team Read more
Key notes
- To remove the DNS Unlocker from Google Chrome, clear browsing history, remove add-ons, reset all the web browsers, or restore your DNS settings of your PC.
- Keep reading to learn the detailed steps.

If you have encountered with unexpected disruptions due to ads related to DNS Unlocker on your Google Chrome, this guide can help!
What is DNS Unlocker? It is a potentially unwanted program or adware which affect web browsers and is designed to alter the Domain Name System (DNS) settings on a PC, redirecting web traffic through its own servers.
How can I remove DNS Unlocker from Chrome?
Before proceeding with any steps to remove the DNS Unlocker from Chrome, go through the following preliminary checks:
- Run a deep scan using a reliable antivirus tool.
- Make sure you change passwords for all your important accounts.
1. Delete the DNS Unlocker app
First restart your computer in Safe mode, follow these steps:
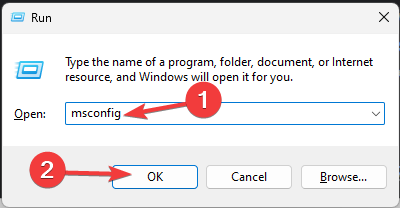
- Press Windows + R to open the Run dialog box.
- Type msconfig and click OK to open the System Configuration window.
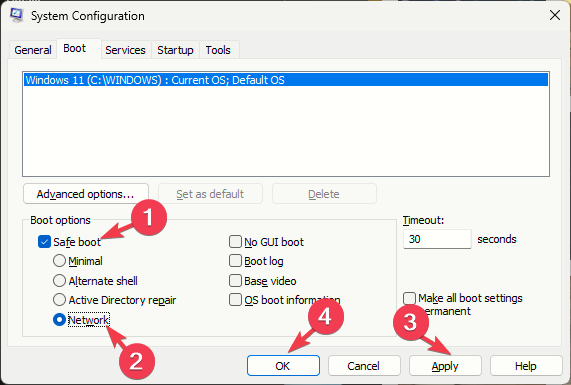
- Go to the Boot tab, locate Boot options, then place a checkmark next to Safe boot and network.
- Click Apply, then OK to save the changes.
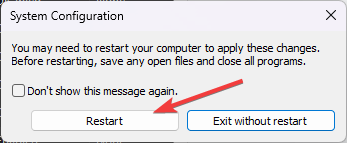
- Now click Restart.
Once your computer reboots, the system will run with minimal set of drivers and no interference from the third-party apps. Now, follow these steps to uninstall the app:
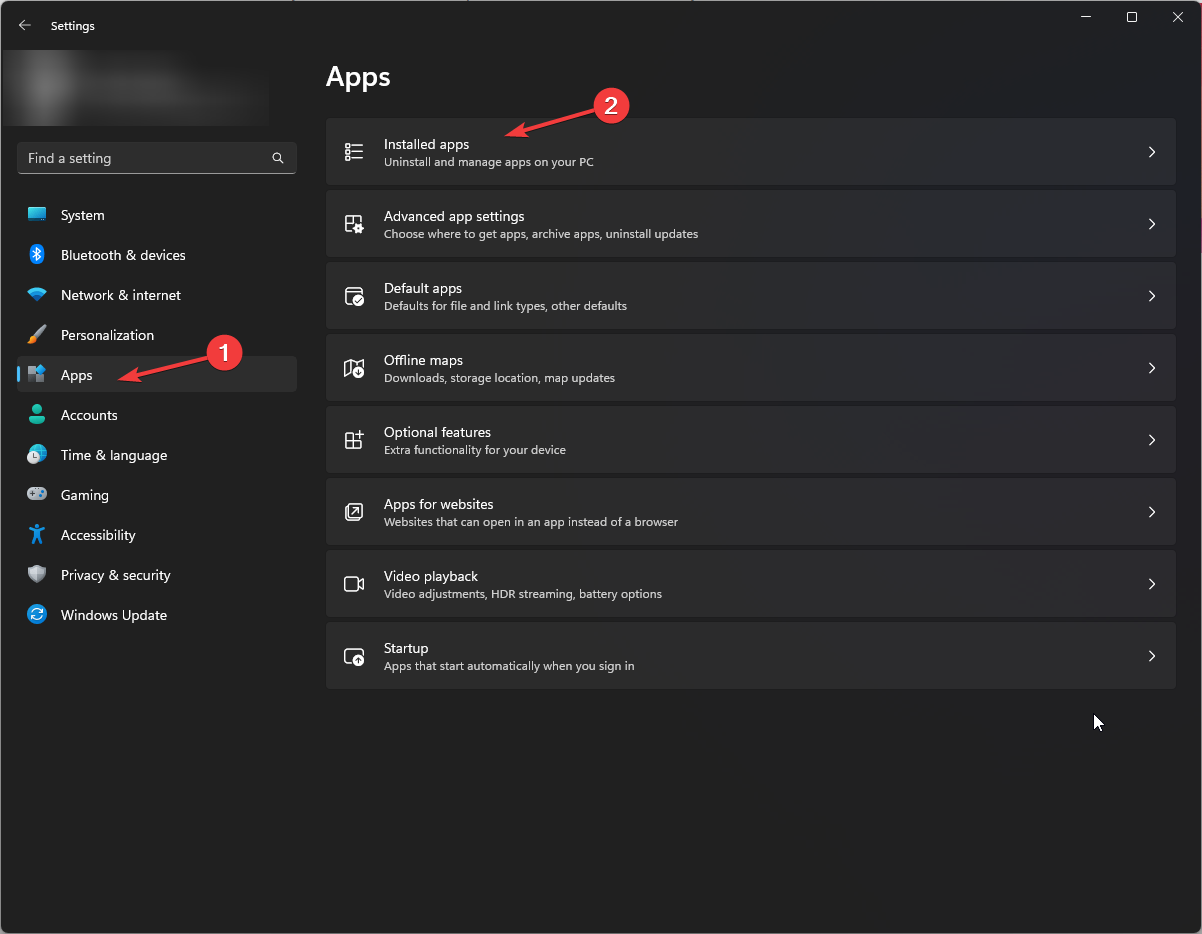
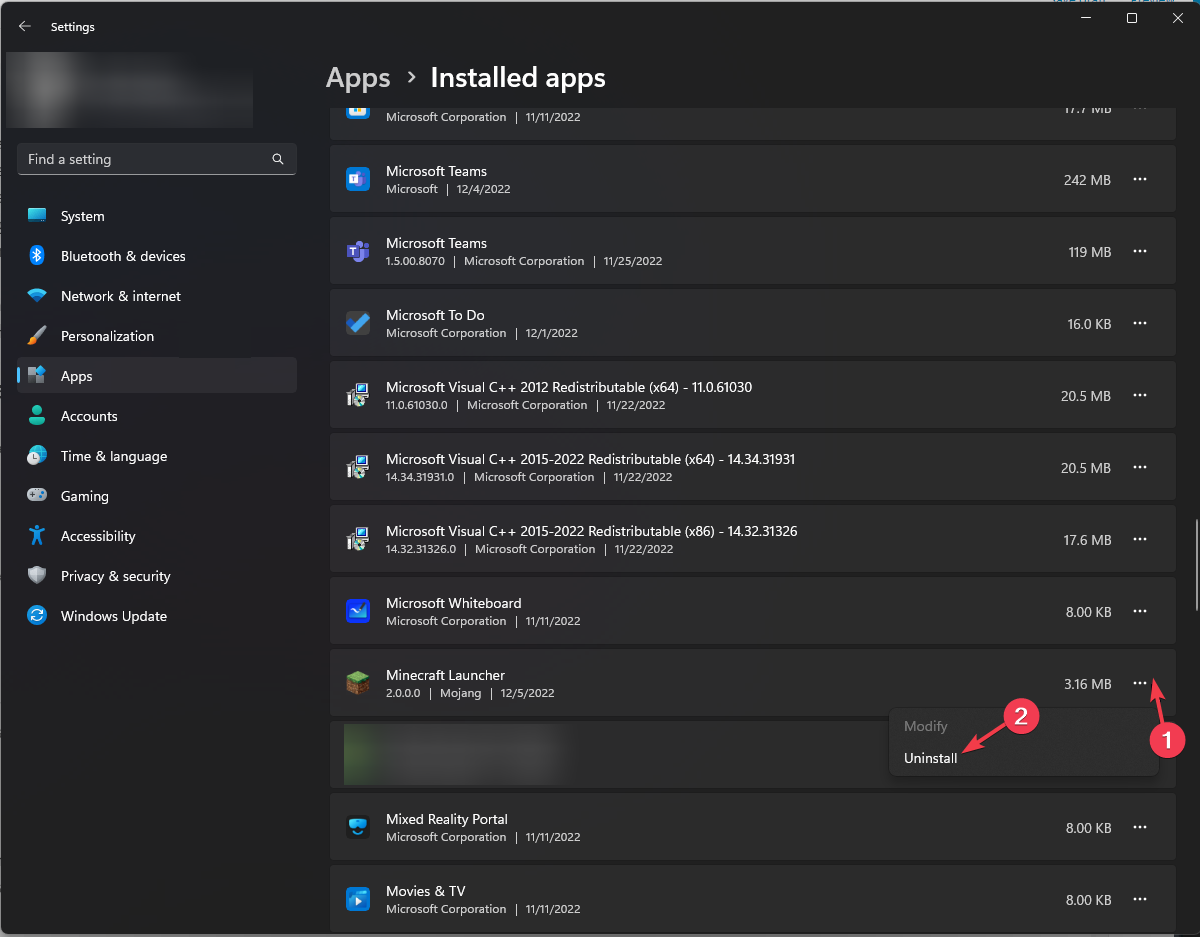
- Press Windows + I to open the Settings app.
- Go to Apps, then select Installed apps.
- Scroll through the list, locate DNS Unlocker, and click three dots icon, then select Uninstall.
- Click Uninstall.
Once DNS Unlocker app is uninstalled, you need check the list of installed apps for unwanted apps, and uninstall them too.
2. Clear the browsing data
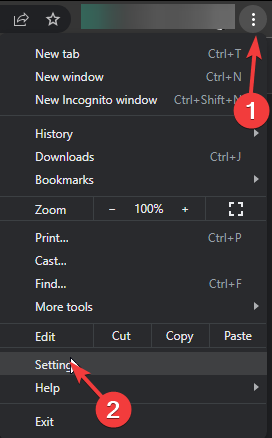
- While in safe mode, launch Google Chrome, click the three dots icon on the upper right corner, and choose Settings from the context menu.
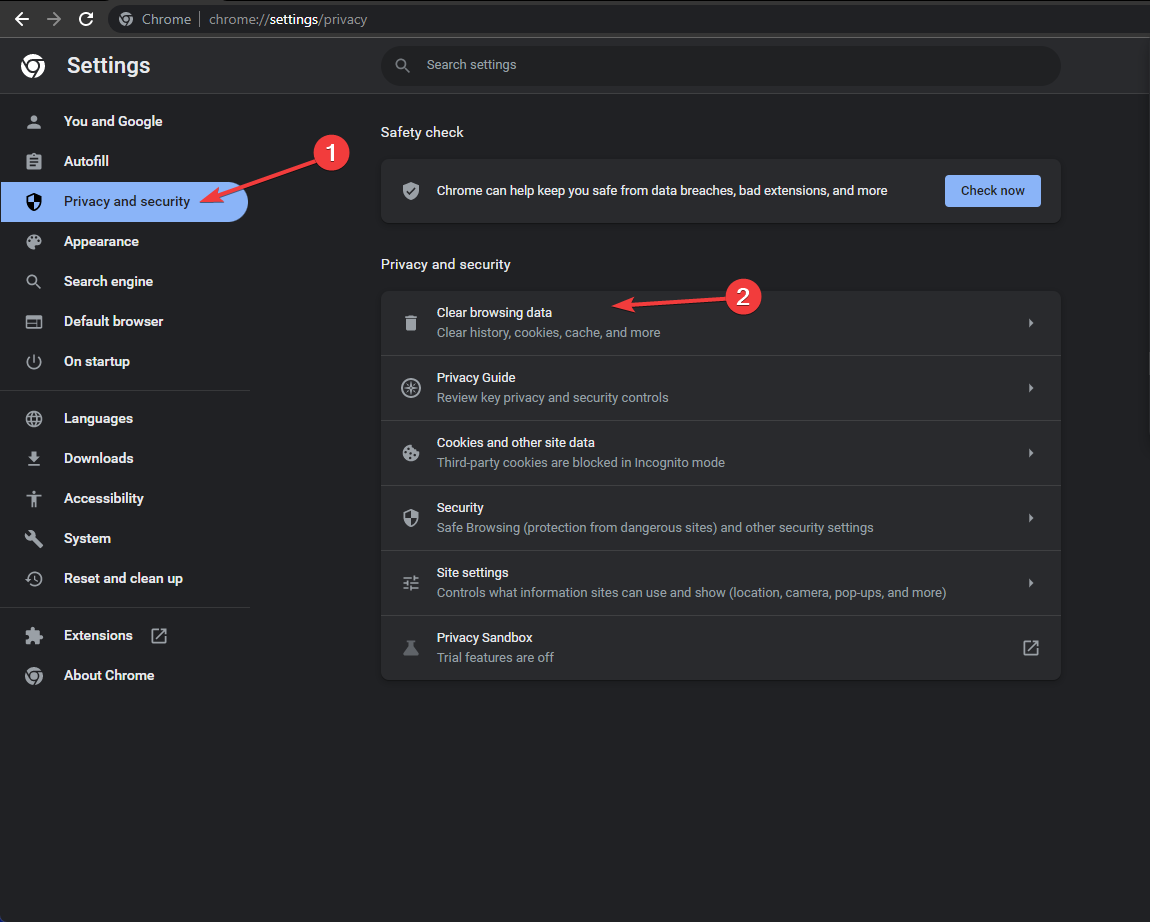
- Click the Privacy and security option, then select Clear browsing data.
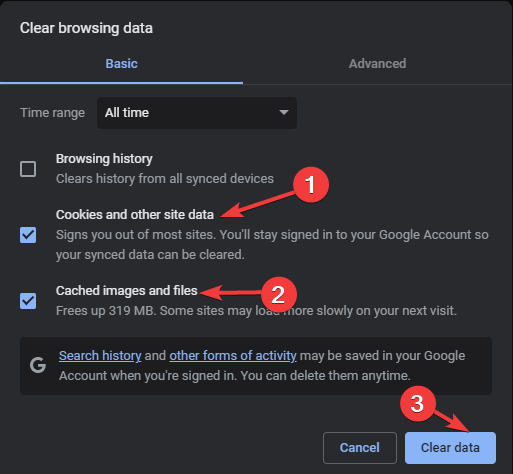
- For Time range, select All time and place a checkmark next to Cookies and other site data, and Cache images and files.
- Click the Clear data button.
3. Remove the unwanted extensions
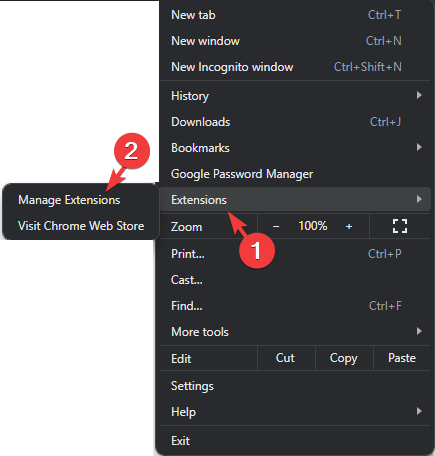
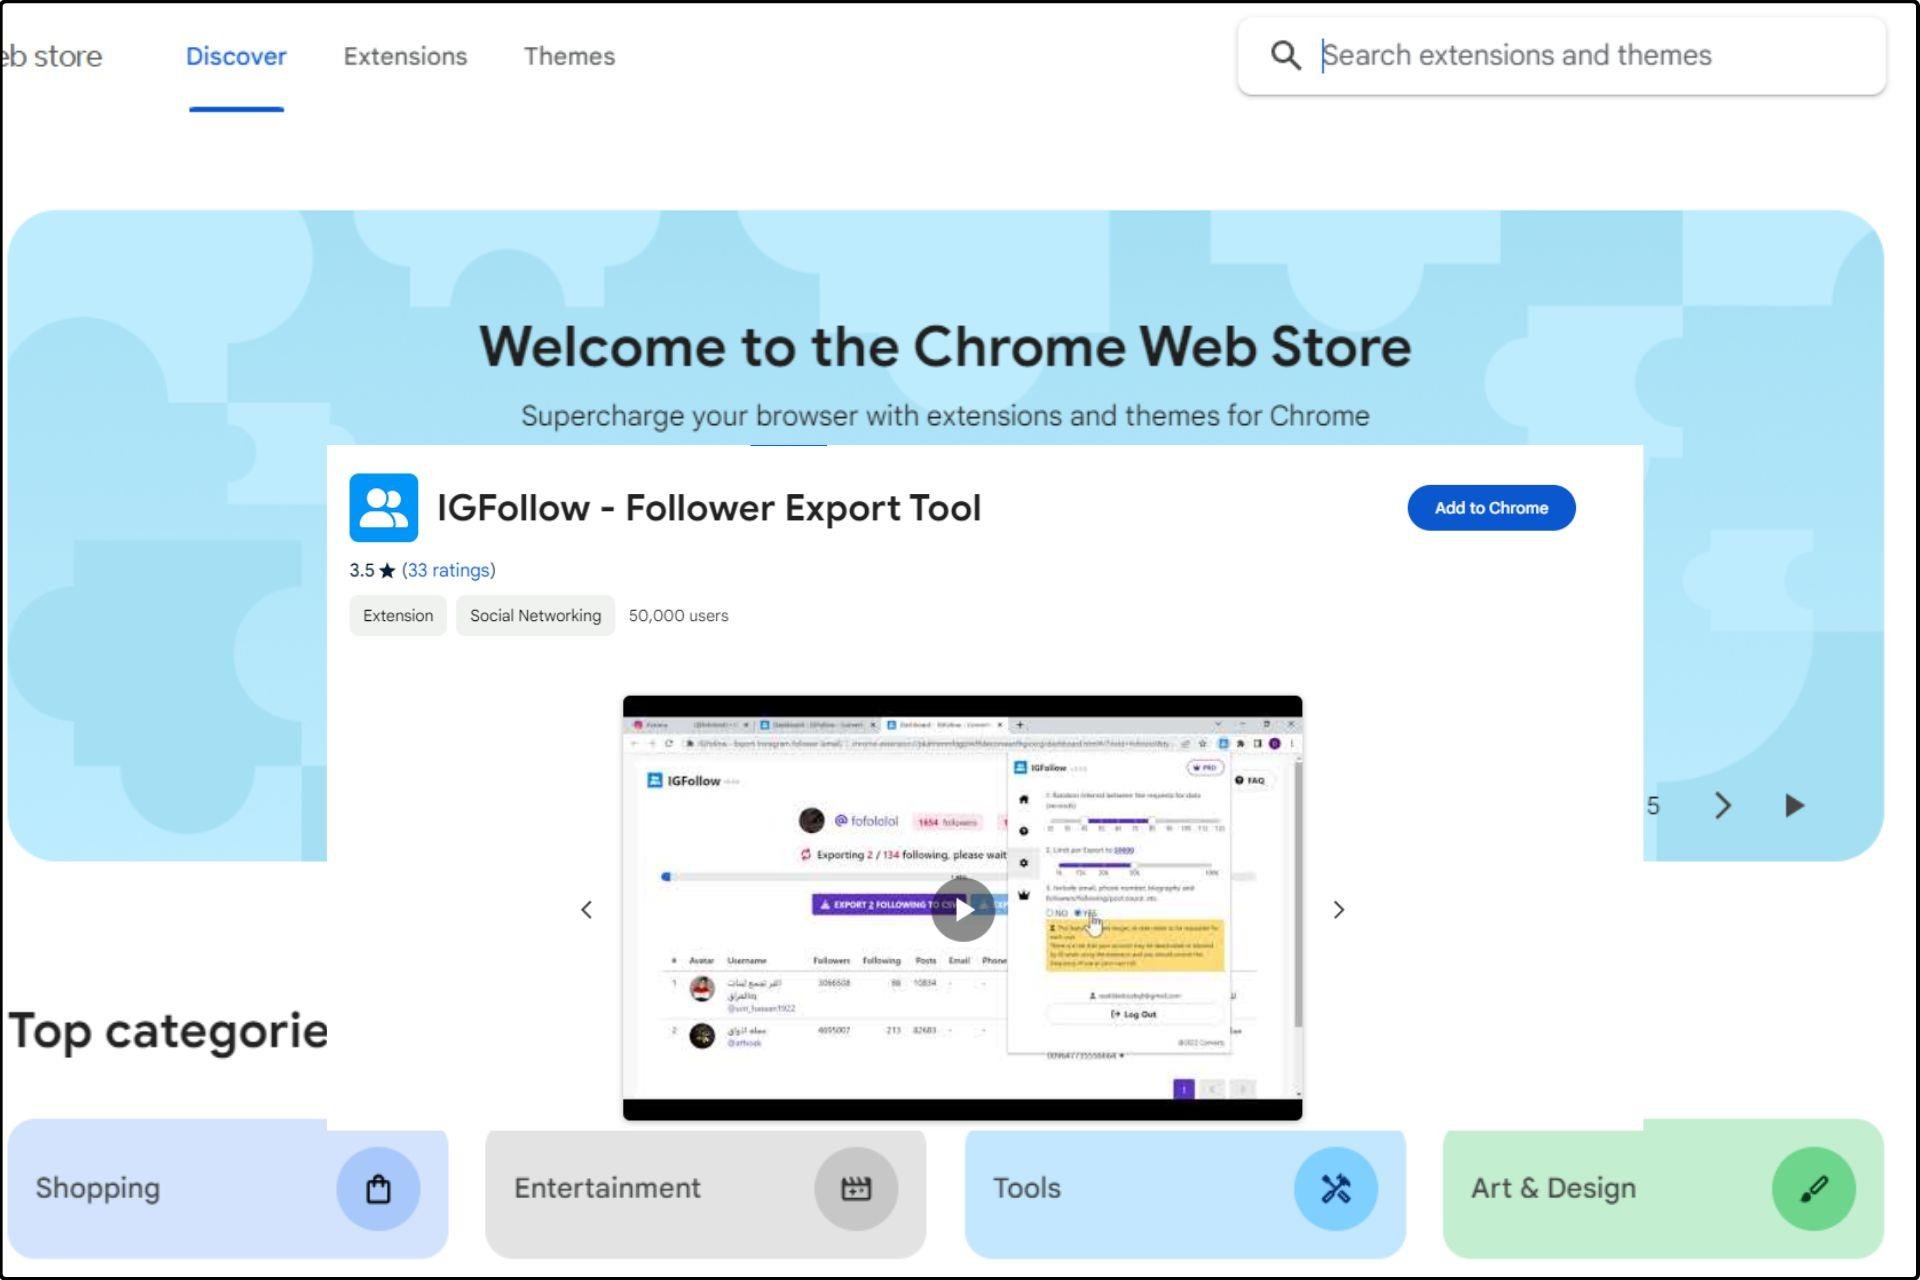
- While in safe mode, launch Google Chrome, click the three dots icon on the upper right corner, and select Extensions from the context menu.
- From the sub-context menu, choose Manage Extensions.
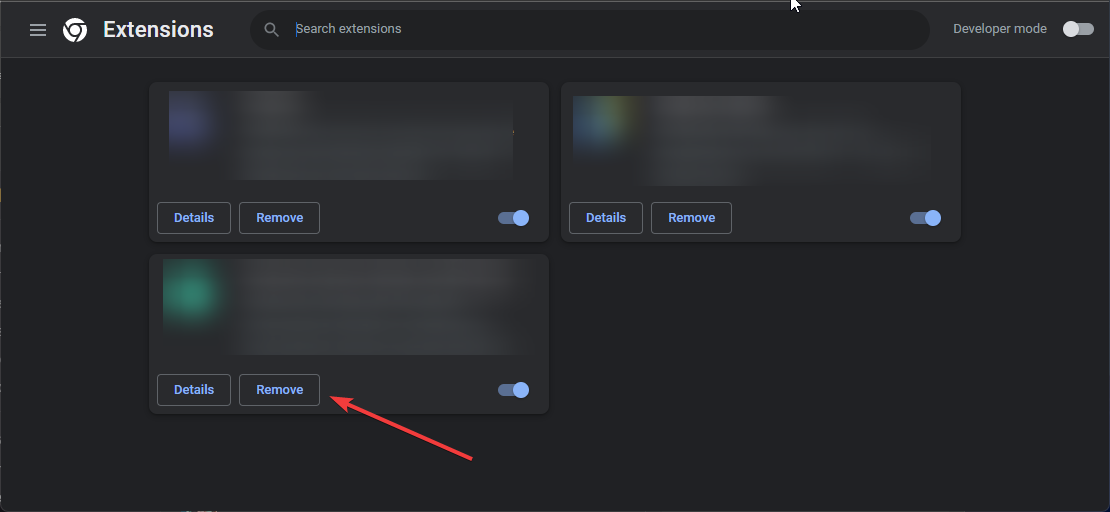
- Carefully examine all the extensions and for all unwanted ones, click Remove to delete them.
4. Check the DNS settings
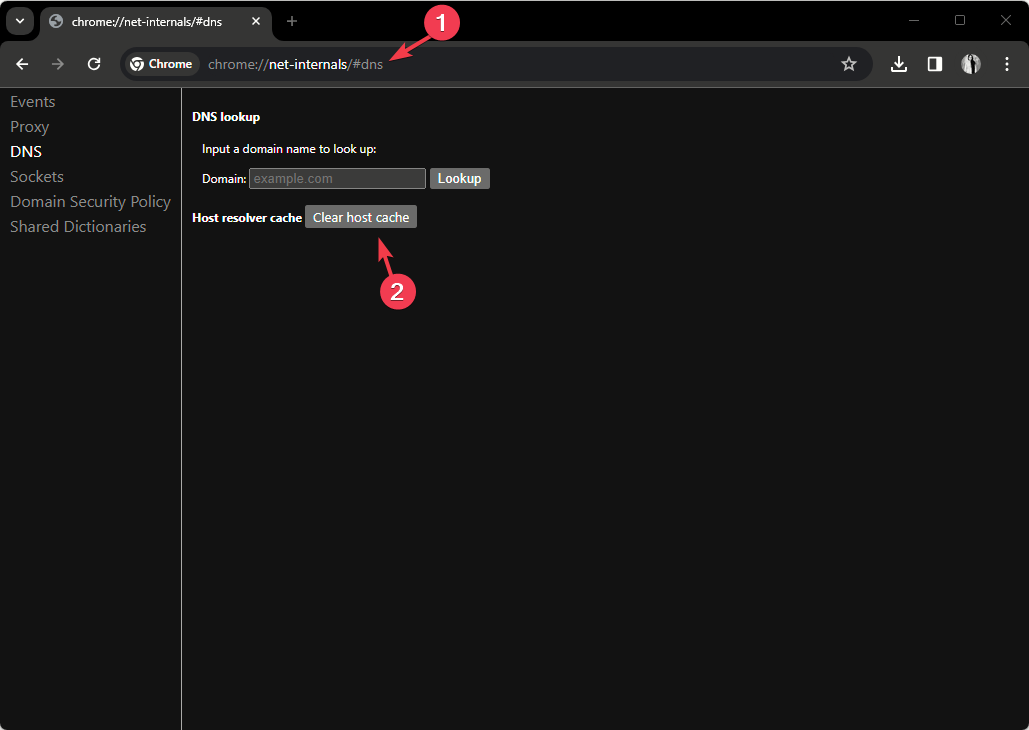
- While in safe mode, open the Google Chrome and type the following command in the address bar and press Enter:
chrome://net-internals/#dns - If you see any entries related to DNS Unlocker, click the Clear host cache button.
- Close the browser.
5. Reset the browser
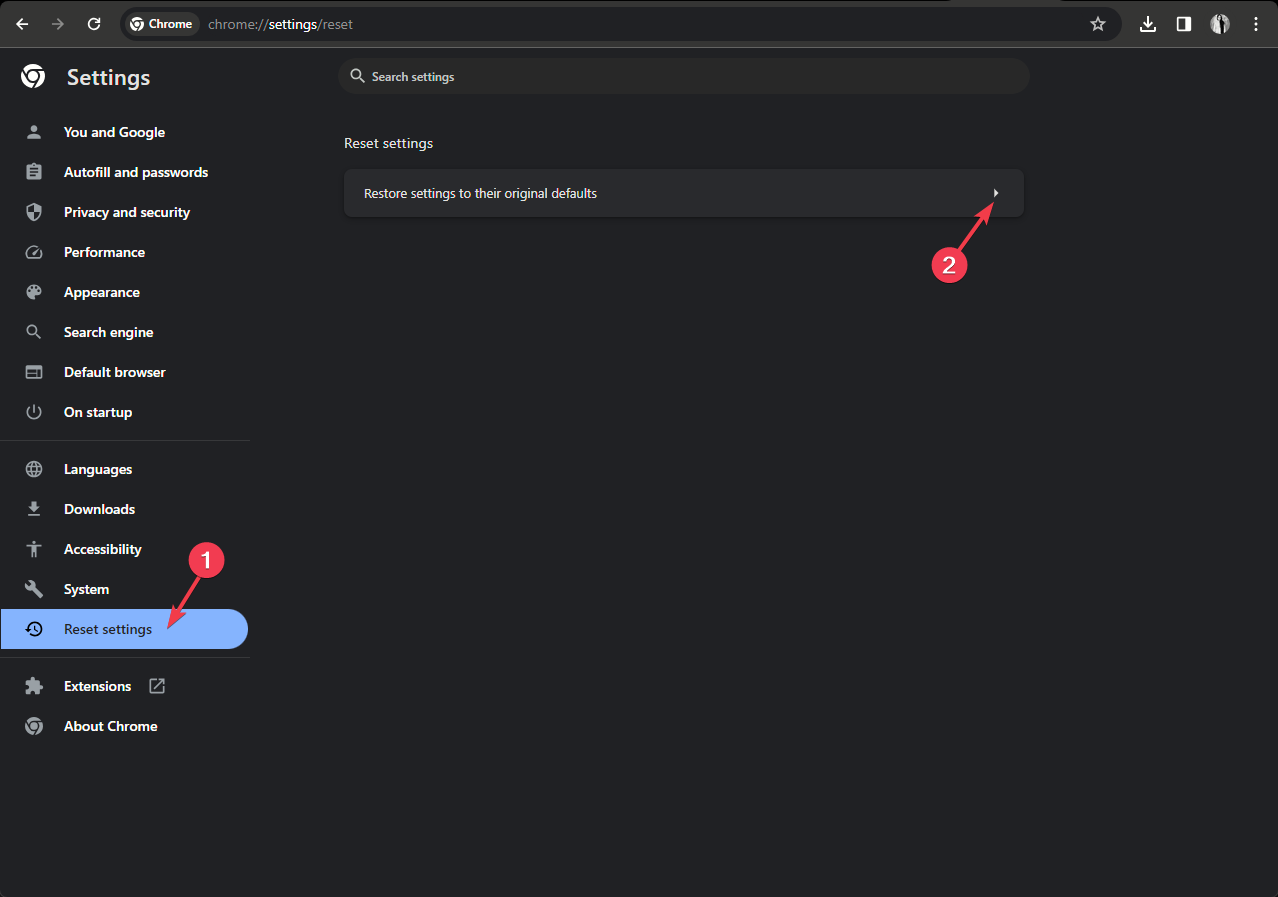
- While in safe mode, launch Chrome, click the three dots icon on the top right corner, and select Settings.
- Click Reset settings from the left pane, then choose Restore settins to their original defaults.
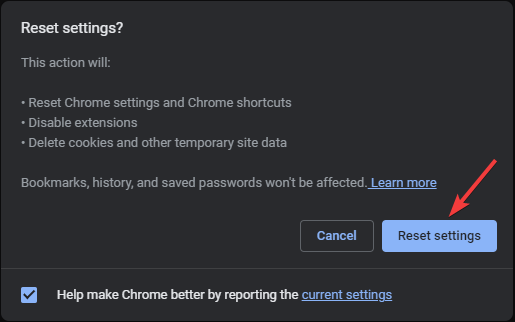
- Now on the Reset settings popup window, select the Reset settings button.
Resetting your browser to default also help you handle errors like There’s a problem with website’s security certificate; read this to learn about it in detail.
6. Restore the DNS settings on your PC
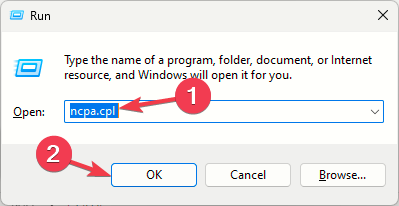
- In safe mode, press Windows + R to open the Run window.
- Type ncpa.cpl and click OK to open the Network Connections window.
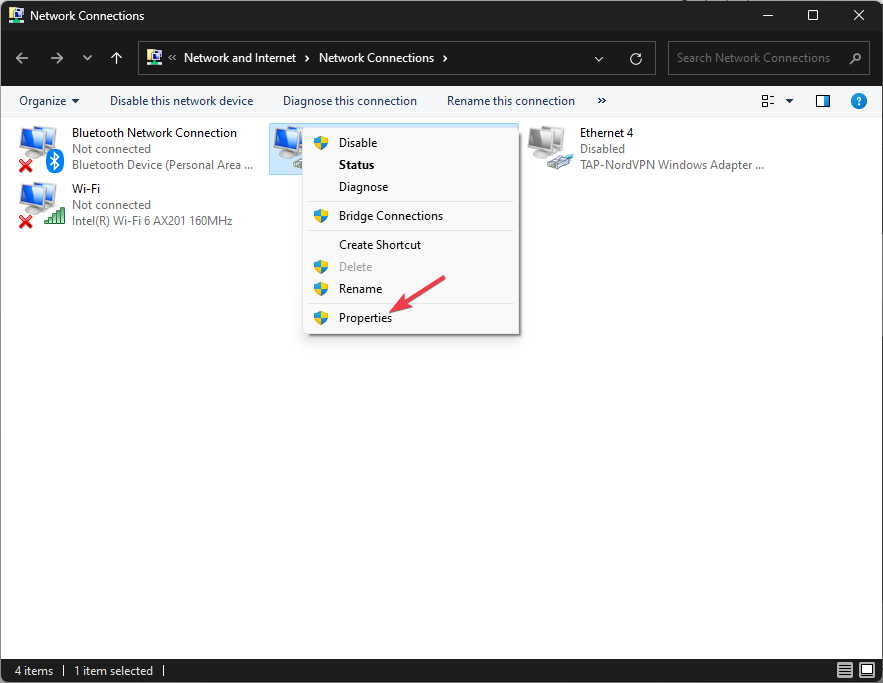
- Right-click the active connection and choose Properties from the context menu.
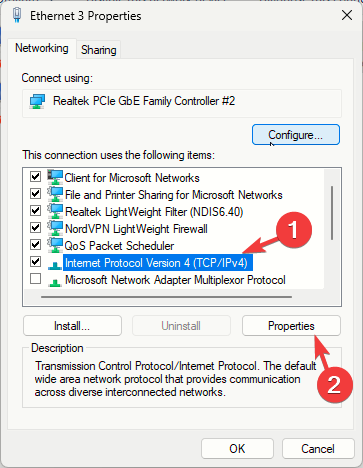
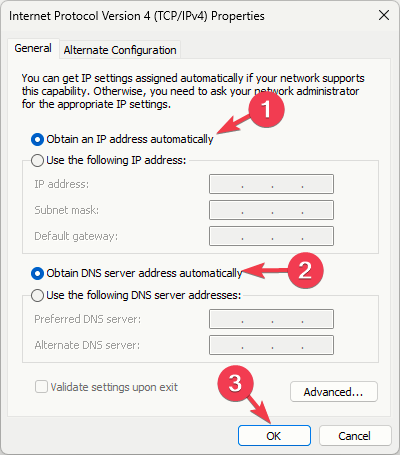
- Select the Internet Protocol Version 4 (TCP/IPv4) option and click Properties.
- Click the radio button next to Obtain DNS Server Address Automatically and Obtain an IP address automatically, then click OK.
Once you have followed all the steps mentioned in the guide, don’t forget to follow the reverse engineer the steps mentioned in Solution 1 to restart your PC normally.
In conclusion, to remove the DNS Unlocker on Google Chrome, you need to remove its extension, uninstall the app from the computer, and clear browsing data.
In case you still see the ads related to the PUPs, try resetting the browser to fix it once and for all. Also, you can use these steps to fix the same issue on other browsers as well.
In case nothing has worked for you, you need a dedicated PUP remover tool to eliminate it; read this guide to learn your options. You can also reset your computer to get rid of the problem.
If you have questions or suggestions about removing DNS Unlocker from Chrome; feel free to mention them in the comments section below. We will be happy to help.

