PC Always Boots Twice? 5 Ways to Permanently Stop it
Disabling ErP Ready in BIOS will fix this issue for good
6 min. read
Updated on
Read our disclosure page to find out how can you help Windows Report sustain the editorial team Read more
Key notes
- If your PC always boots twice, it might be because of some overclocking features.
- One simple yet effective solution to this issue is to disable the Fast Startup feature.
- Another excellent fix is to disable Internal PLL overvoltage.
Boot issues are among the dreadful problems users don’t want to encounter due to the technicality usually involved in fixing them. Some of our readers are reporting that their PC always boots twice.
This issue is not the most complex, as it allows you to get into your PC after the second boot, unlike the Windows 11 keep restarting issue. But fixing it is still not easy unless with detailed information like the one provided in this guide.
Why does my PC boot twice?
Listed below are some of the notable reasons your PC always boots twice before starting up:
- Overclocking – If you overclock your device by activating PLL overvoltage, your PC may restart 2 times before booting. What you need to do here is to disable all overclocking features.
- Problems with Fast Startup – This issue can be caused by the Fast Startup feature that allows your PC to boot quickly after you shut it down. Disabling this feature should help you fix the issue.
- Outdated PC – If your system is outdated, it is likely to encounter different issues, including this one. You need to update your OS to the latest version to restore normal service on your device.
- Outdated BIOS – At times, your device might boot multiple times because your BIOS is outdated. To fix this, you need to install the latest version of the BIOS and update it.
Now that we know the possible causes, let’s go ahead and apply the solutions below.
How can I fix my PC if it always boots twice?
Before exploring the more detailed fixes in this section, below are some basic troubleshooting steps to try:
- Update your BIOS from the manufacturer’s website.
- Make sure that your Windows is updated as well.
- Remove one of your RAMs if you use two to check if the problem is with either of them. Try with another RAM if you use just one.
- Replace the CMOS battery (if applicable).
Another option is to simply ignore it because this is common in ASUS motherboards that have dual boots.
So, if your device boots normally on the second boot without any problem, you might want to ignore it, especially if you are not overclocking anything and your BIOS is up-to-date.
However, you may delve into the fixes below if you want to get rid of this problem.
1. Disable Fast Startup
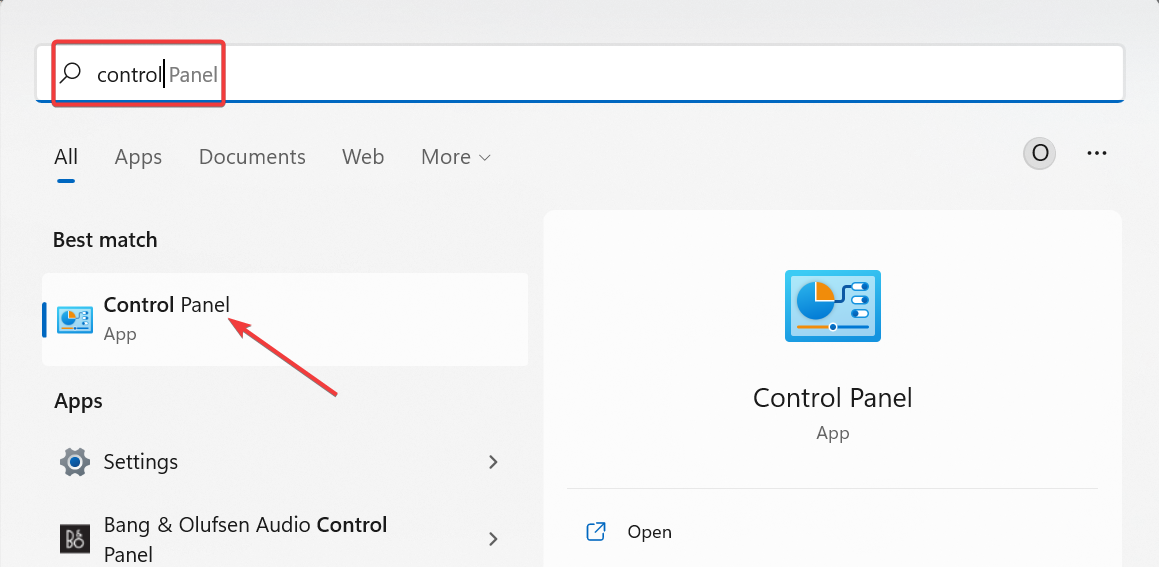
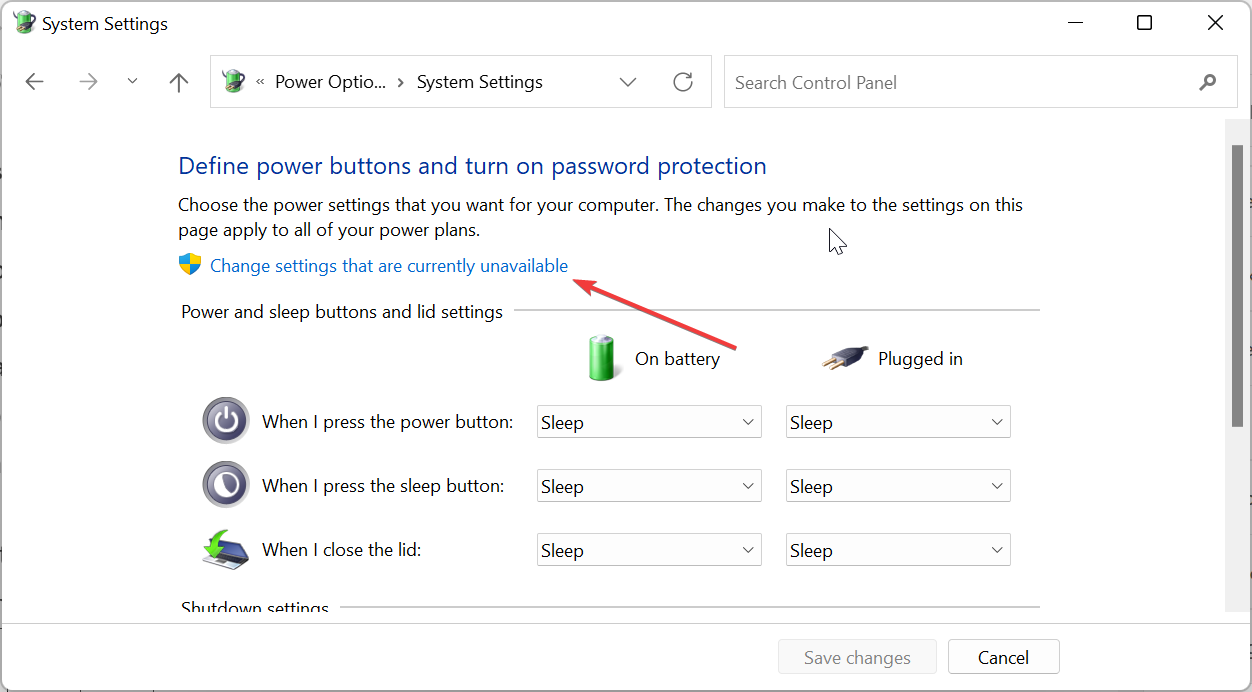
- Press Windows + S, type control, and select Control Panel.
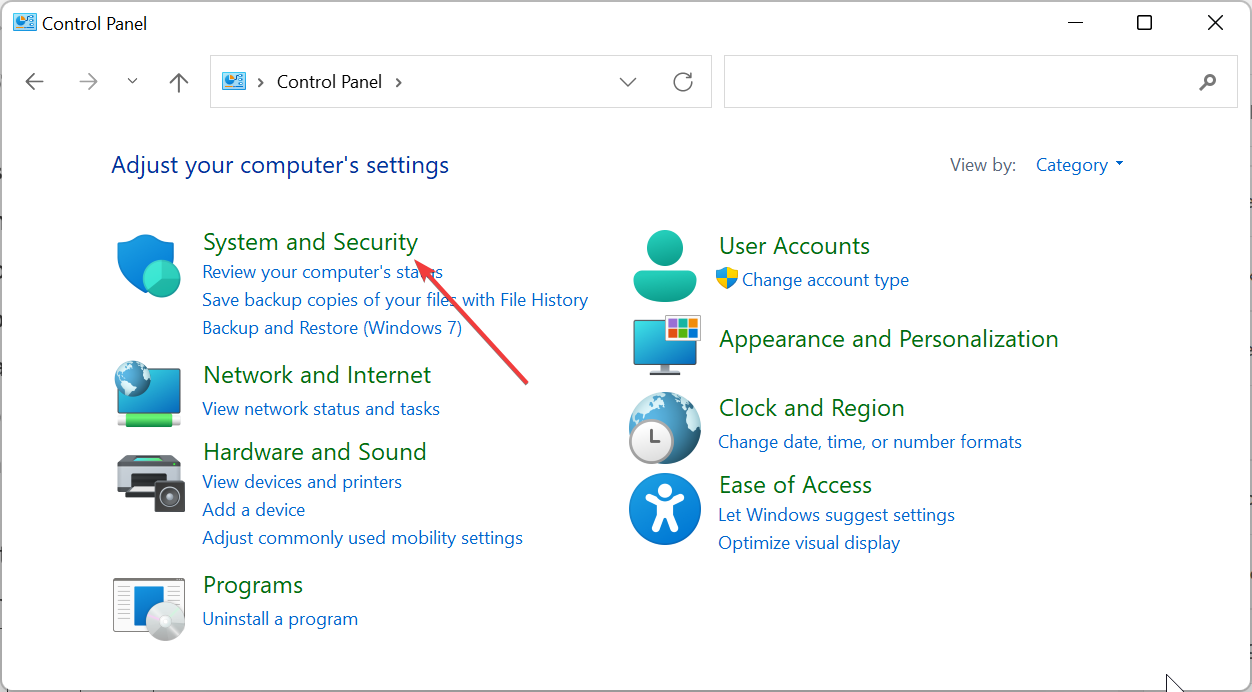
- Choose System and Security.
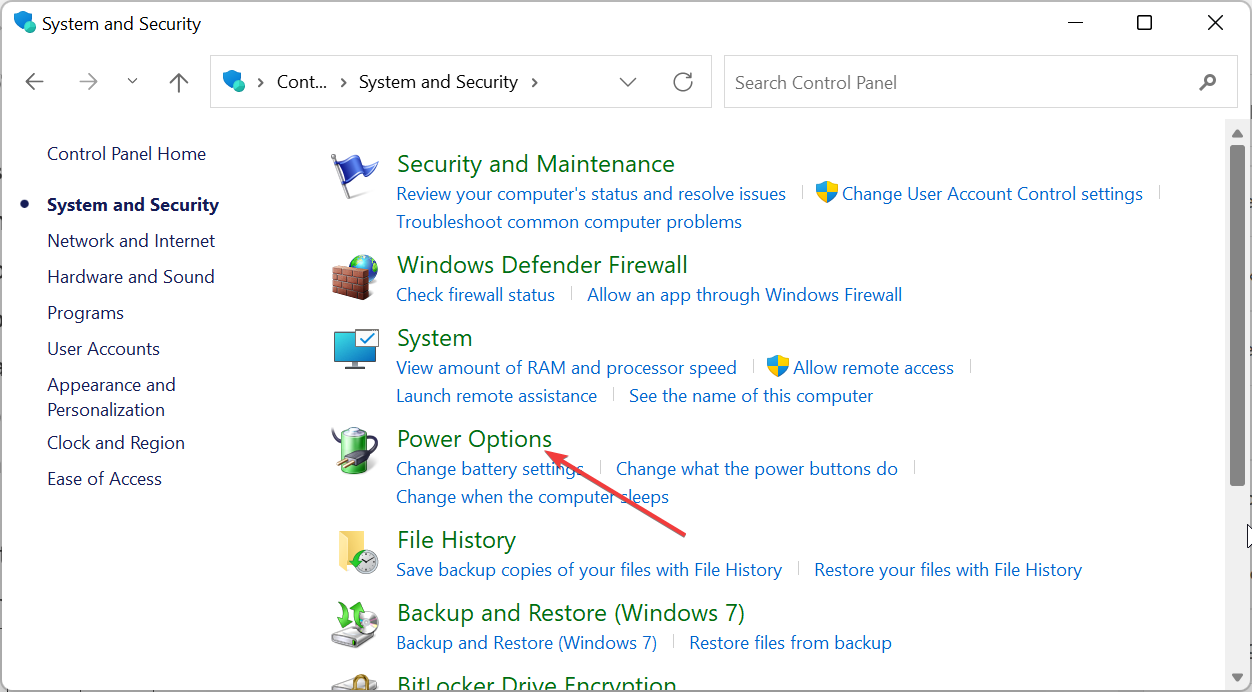
- Now, select Power Options.
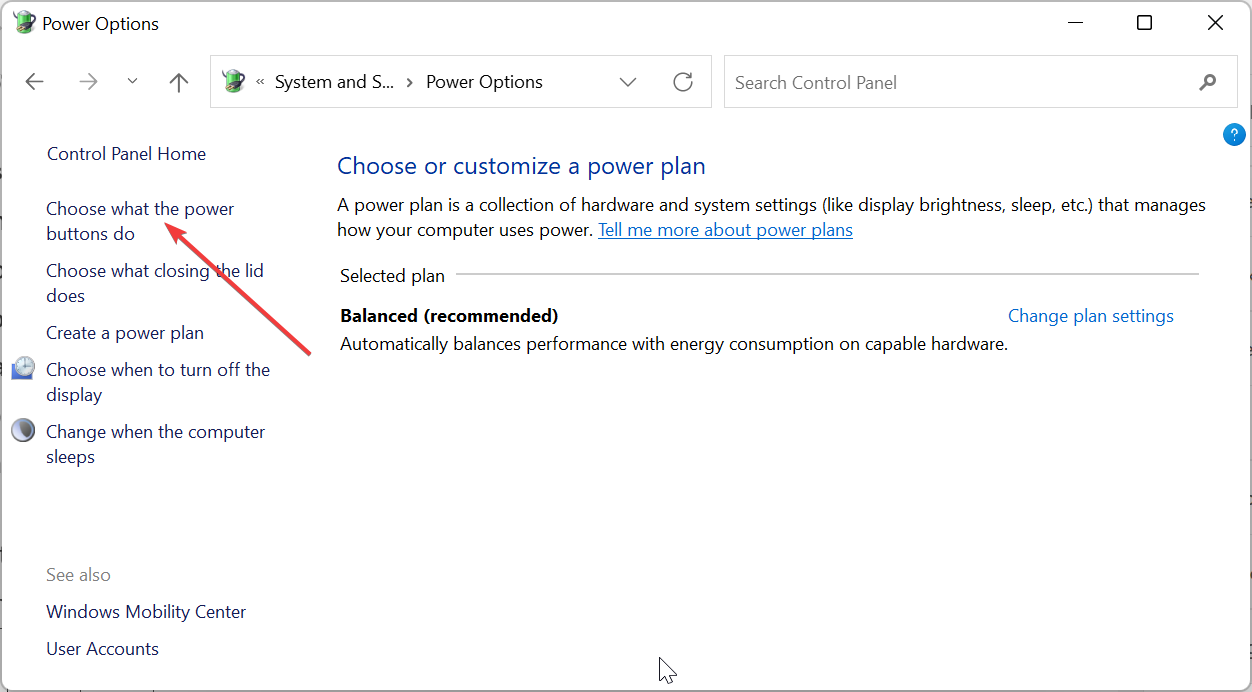
- Click the Choose what the power buttons do option in the left pane.
- Next, click Change settings that are currently unavailable.
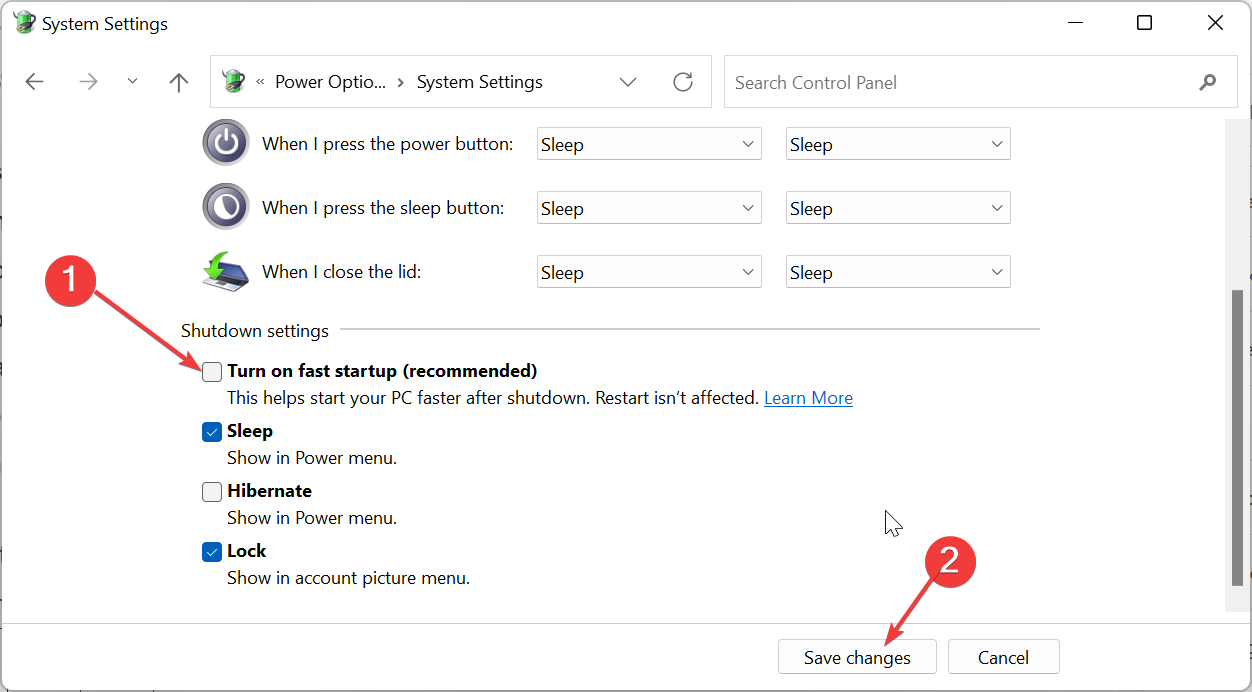
- Uncheck the box for Turn on fast startup (recommended).
- Finally, click the Save changes button.
The Fast Startup feature does not allow your PC to shut down completely in a bid to increase the startup time. This is why some users’ PC always boots twice. So you need to disable the feature to solve the problem.
2. Disable the Internal PLL overvoltage
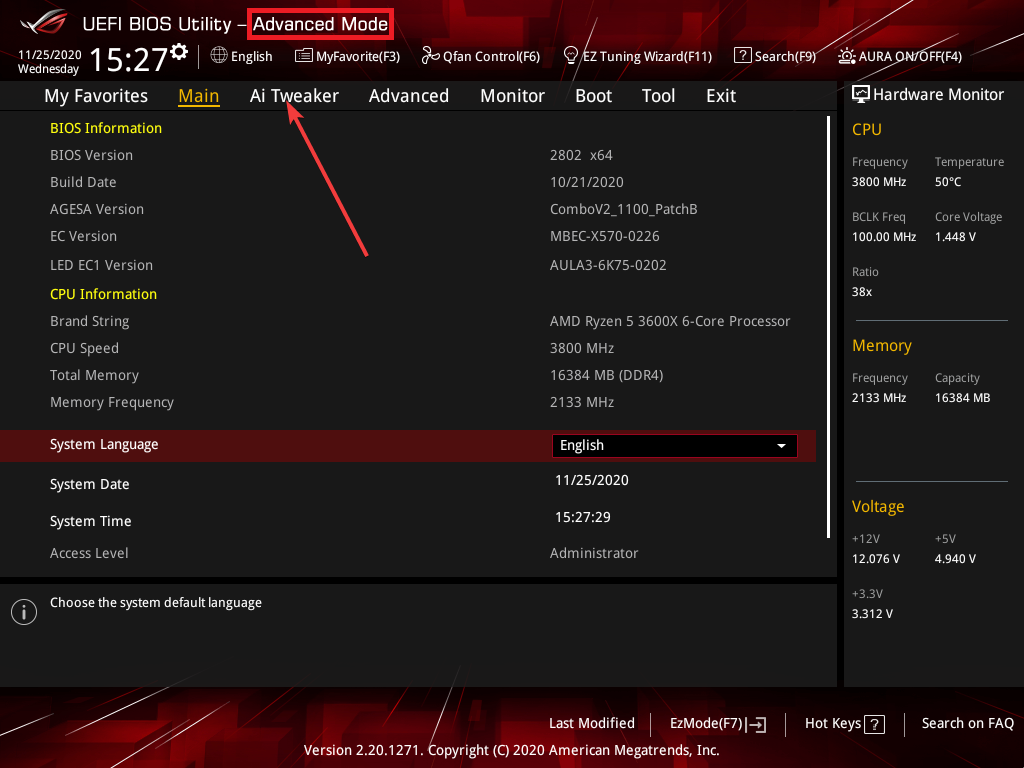
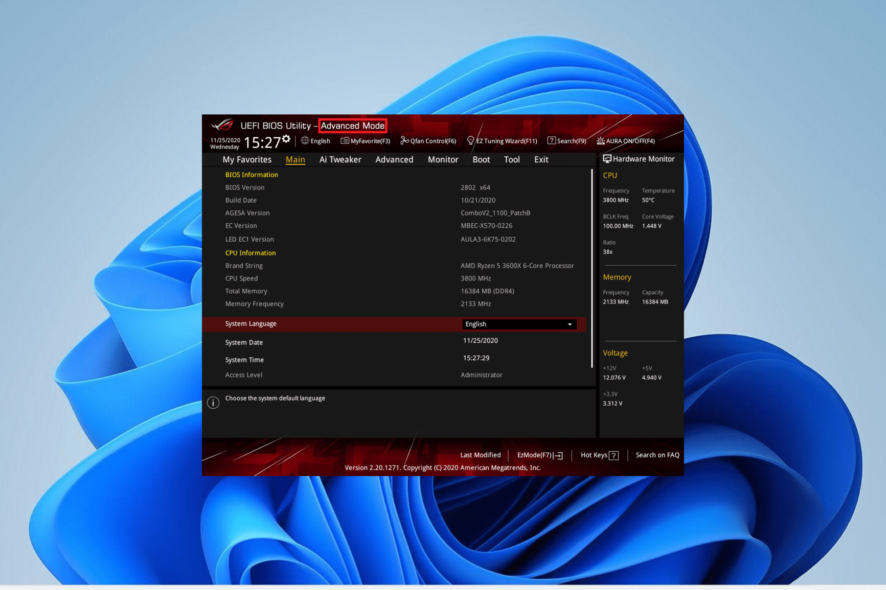
- Power off your PC and power it on again. Keep pressing the BIOS key (F2, Del, or the corresponding one for your PC) when the manufacturer’s logo shows up to enter BIOS.
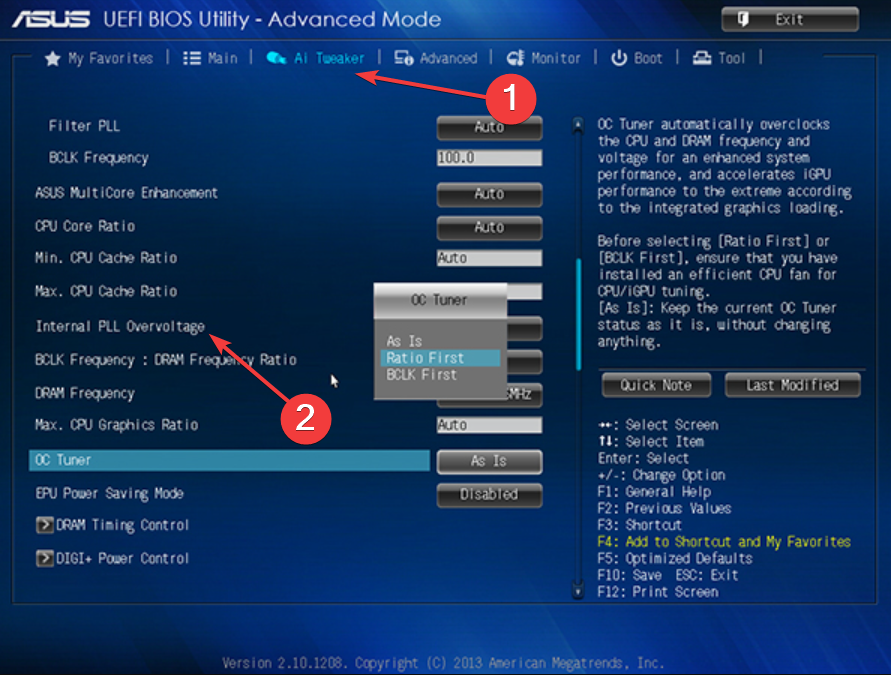
- Now, use the arrow keys to navigate to the AI Tweaker option at the top and press Enter. In some BIOS, you will find Extreme Tweaker instead.
- Next, scroll down and select Internal PLL Overvoltage.
- Finally, set its value to Disabled, save your changes, and restart your PC.
The CPU PLL overvoltage allows you to reach a higher frequency on your CPU. It is mostly used by users who want to reach 4.6 GHz and above.
However, this feature is known to cause sleep issues and has been reported to make a PC always boot twice or more. So, if you don’t need a high CPU frequency, you should disable the feature.
Note that the BIOS configuration might differ – the above is for ASUS BIOS. But the differences should not be too wide.
3. Enable Power On by PCIe
- Enter BIOS as shown in step 1 of solution 4.
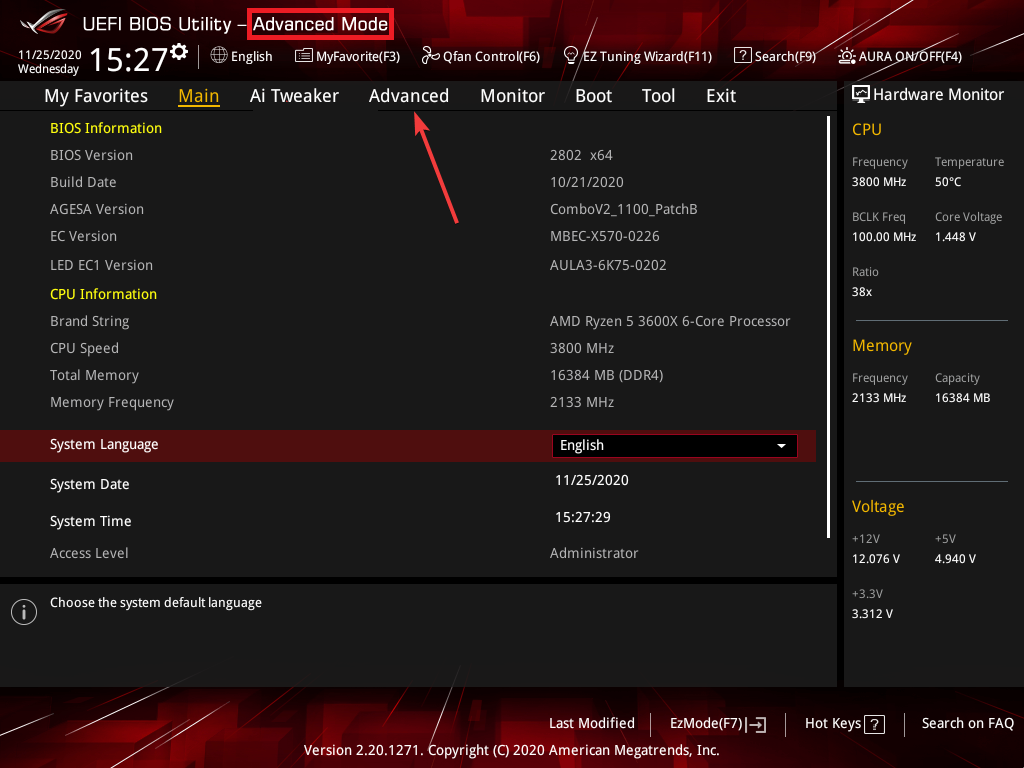
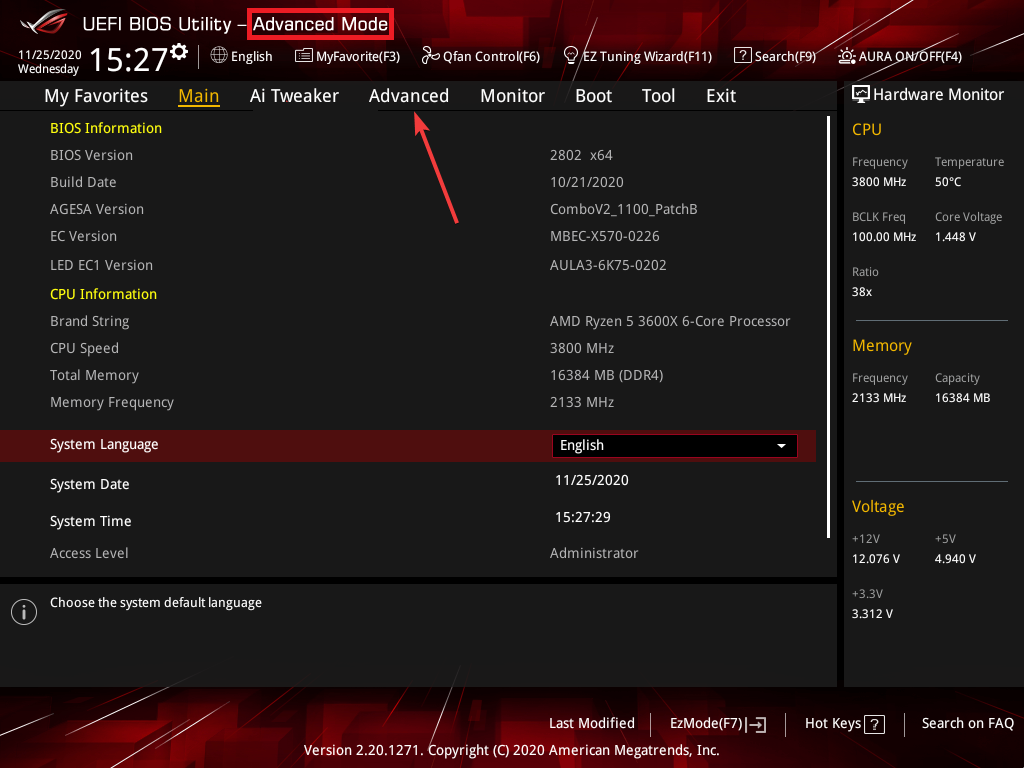
- Navigate to the Advanced tab at the top using the arrow keys and press Enter.
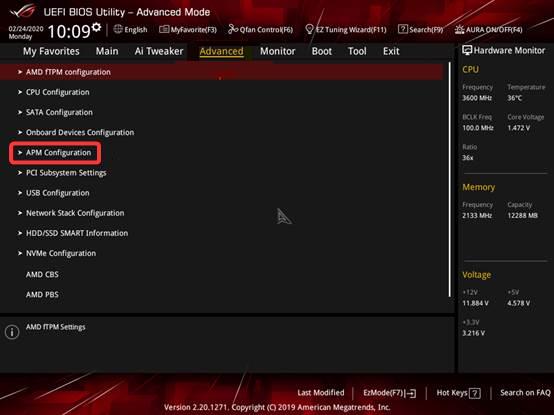
- Now, select APM Configuration on the next page.
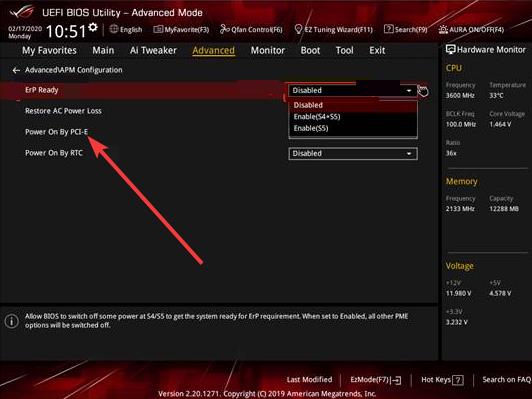
- Select the Power on By PCl-E option.
- Set it to Enable.
- Finally, save the settings and restart your PC.
The Power On by PCle feature makes your device boot quickly when it detects a network. This can improve your boot time and eliminate the factors that make your PC always boots twice.
4. Disable ERP
- Enter BIOS as shown in previous solutions.
- Select the Advanced tab at the top.
- Next, choose APM Configuration.
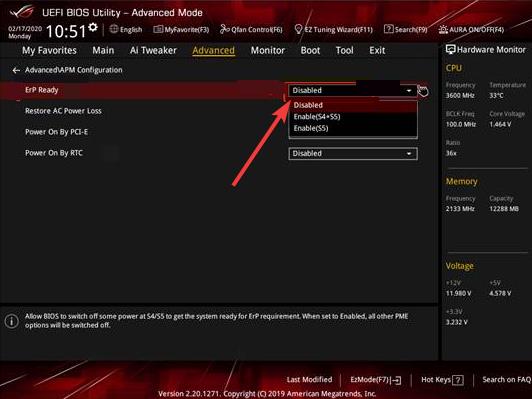
- Navigate to ErP Ready and press Enter to select it.
- Finally, choose the Disable option, save the changes, and restart your system.
The ErP mode helps to improve power-saving on your PC. So, your PC shuts down completely and might require it always to boot twice to come up. Also, it automatically disables wake-up features like Power On by PCIe and Power On by keyboard.
So, you need to disable it to get past the issue.
5. Turn off XMP
- Enter BIOS as shown in the previous solutions.
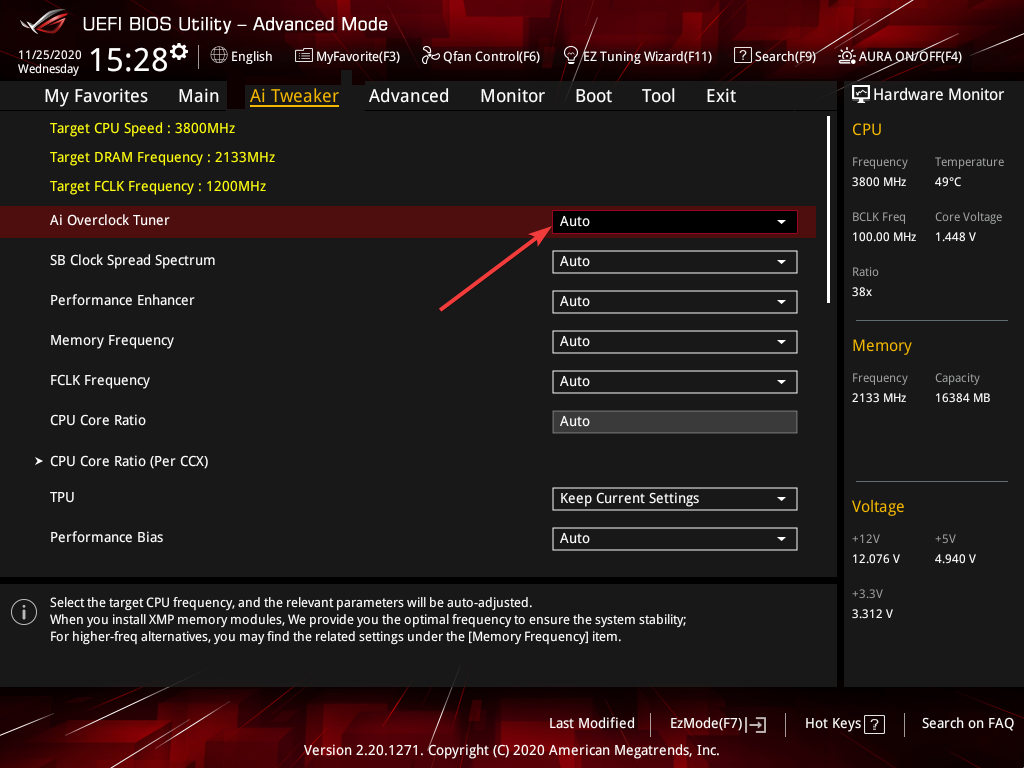
- Navigate to the Ai Tweaker tab and select it.
- Now, choose Ai Overclock Tuner.
- Set it to Auto and save your changes.
- Finally, restart your PC.
XMP is the safe overclocking feature included in your BIOS. However, there are some devices with specifications that are not that compatible with this feature.
If you are using such a device, it might be the reason your PC always boots twice. So, you need to disable the feature for good. Note that on AMD motherboards, you will see DOCP instead of XMP.
We have reached the end of this detailed guide on how to fix your PC if it always boots twice. If you have gotten to this point, the issue should be gone for good, provided you follow the fixes above carefully.
Similarly, if your computer keeps restarting before Windows loads, check our detailed guide to fix it.
Feel free to let us know the solution that helped you fix this issue in the comments below.

